The pitfall of using tshark to analyse QUIC protocol

Check the wireshark’s QUIC related code, we will find it heavily depends on 2 macros:

#ifdef HAVE_LIBGCRYPT_AEAD
......
#endif

#ifdef HAVE_LIBGCRYPT_CHACHA20
......
#endif

And these 2 macros rely on the version of libgcrypt (refer here):

/*
 * Define HAVE_LIBGCRYPT_AEAD here, because it's used in several source
 * files.
 */
#if GCRYPT_VERSION_NUMBER >= 0x010600 /* 1.6.0 */
/* Whether to provide support for authentication in addition to decryption. */
#define HAVE_LIBGCRYPT_AEAD
#endif

/*
 * Define some other "do we have?" items as well.
 */
#if GCRYPT_VERSION_NUMBER >= 0x010700 /* 1.7.0 */
/* Whether ChaCh20 PNE can be supported. */
#define HAVE_LIBGCRYPT_CHACHA20
/* Whether AEAD_CHACHA20_POLY1305 can be supported. */
#define HAVE_LIBGCRYPT_CHACHA20_POLY1305
#endif

On CentOS 7, the libgcrypt version is 1.5.3, so the above 2 macros will not be defined, and some functions are not available. While on CentOS 8, the libgcrypt version is 1.8.5, so the functions are fully supported. I met an issue, i.e., for the same pcap file, tshark (I built myself) on CentOS 7 assumes there is an error in decrypting QUIC flow:

$ /home/nanxiao/wireshark/build/run/tshark -nr 435.pcap -Y '(quic.decryption_failed)'
    1   0.000000 172.27.232.168 → 216.183.220.159 GTP <QUIC> 1310 Initial, DCID=68a3ee8706f87817

while tshark on CentOS 8 works OK:

$ /home/nanxiao/wireshark/build/run/tshark -nr 435.pcap -Y '(quic.decryption_failed)'
$
Use tshark to filter HTTP streams

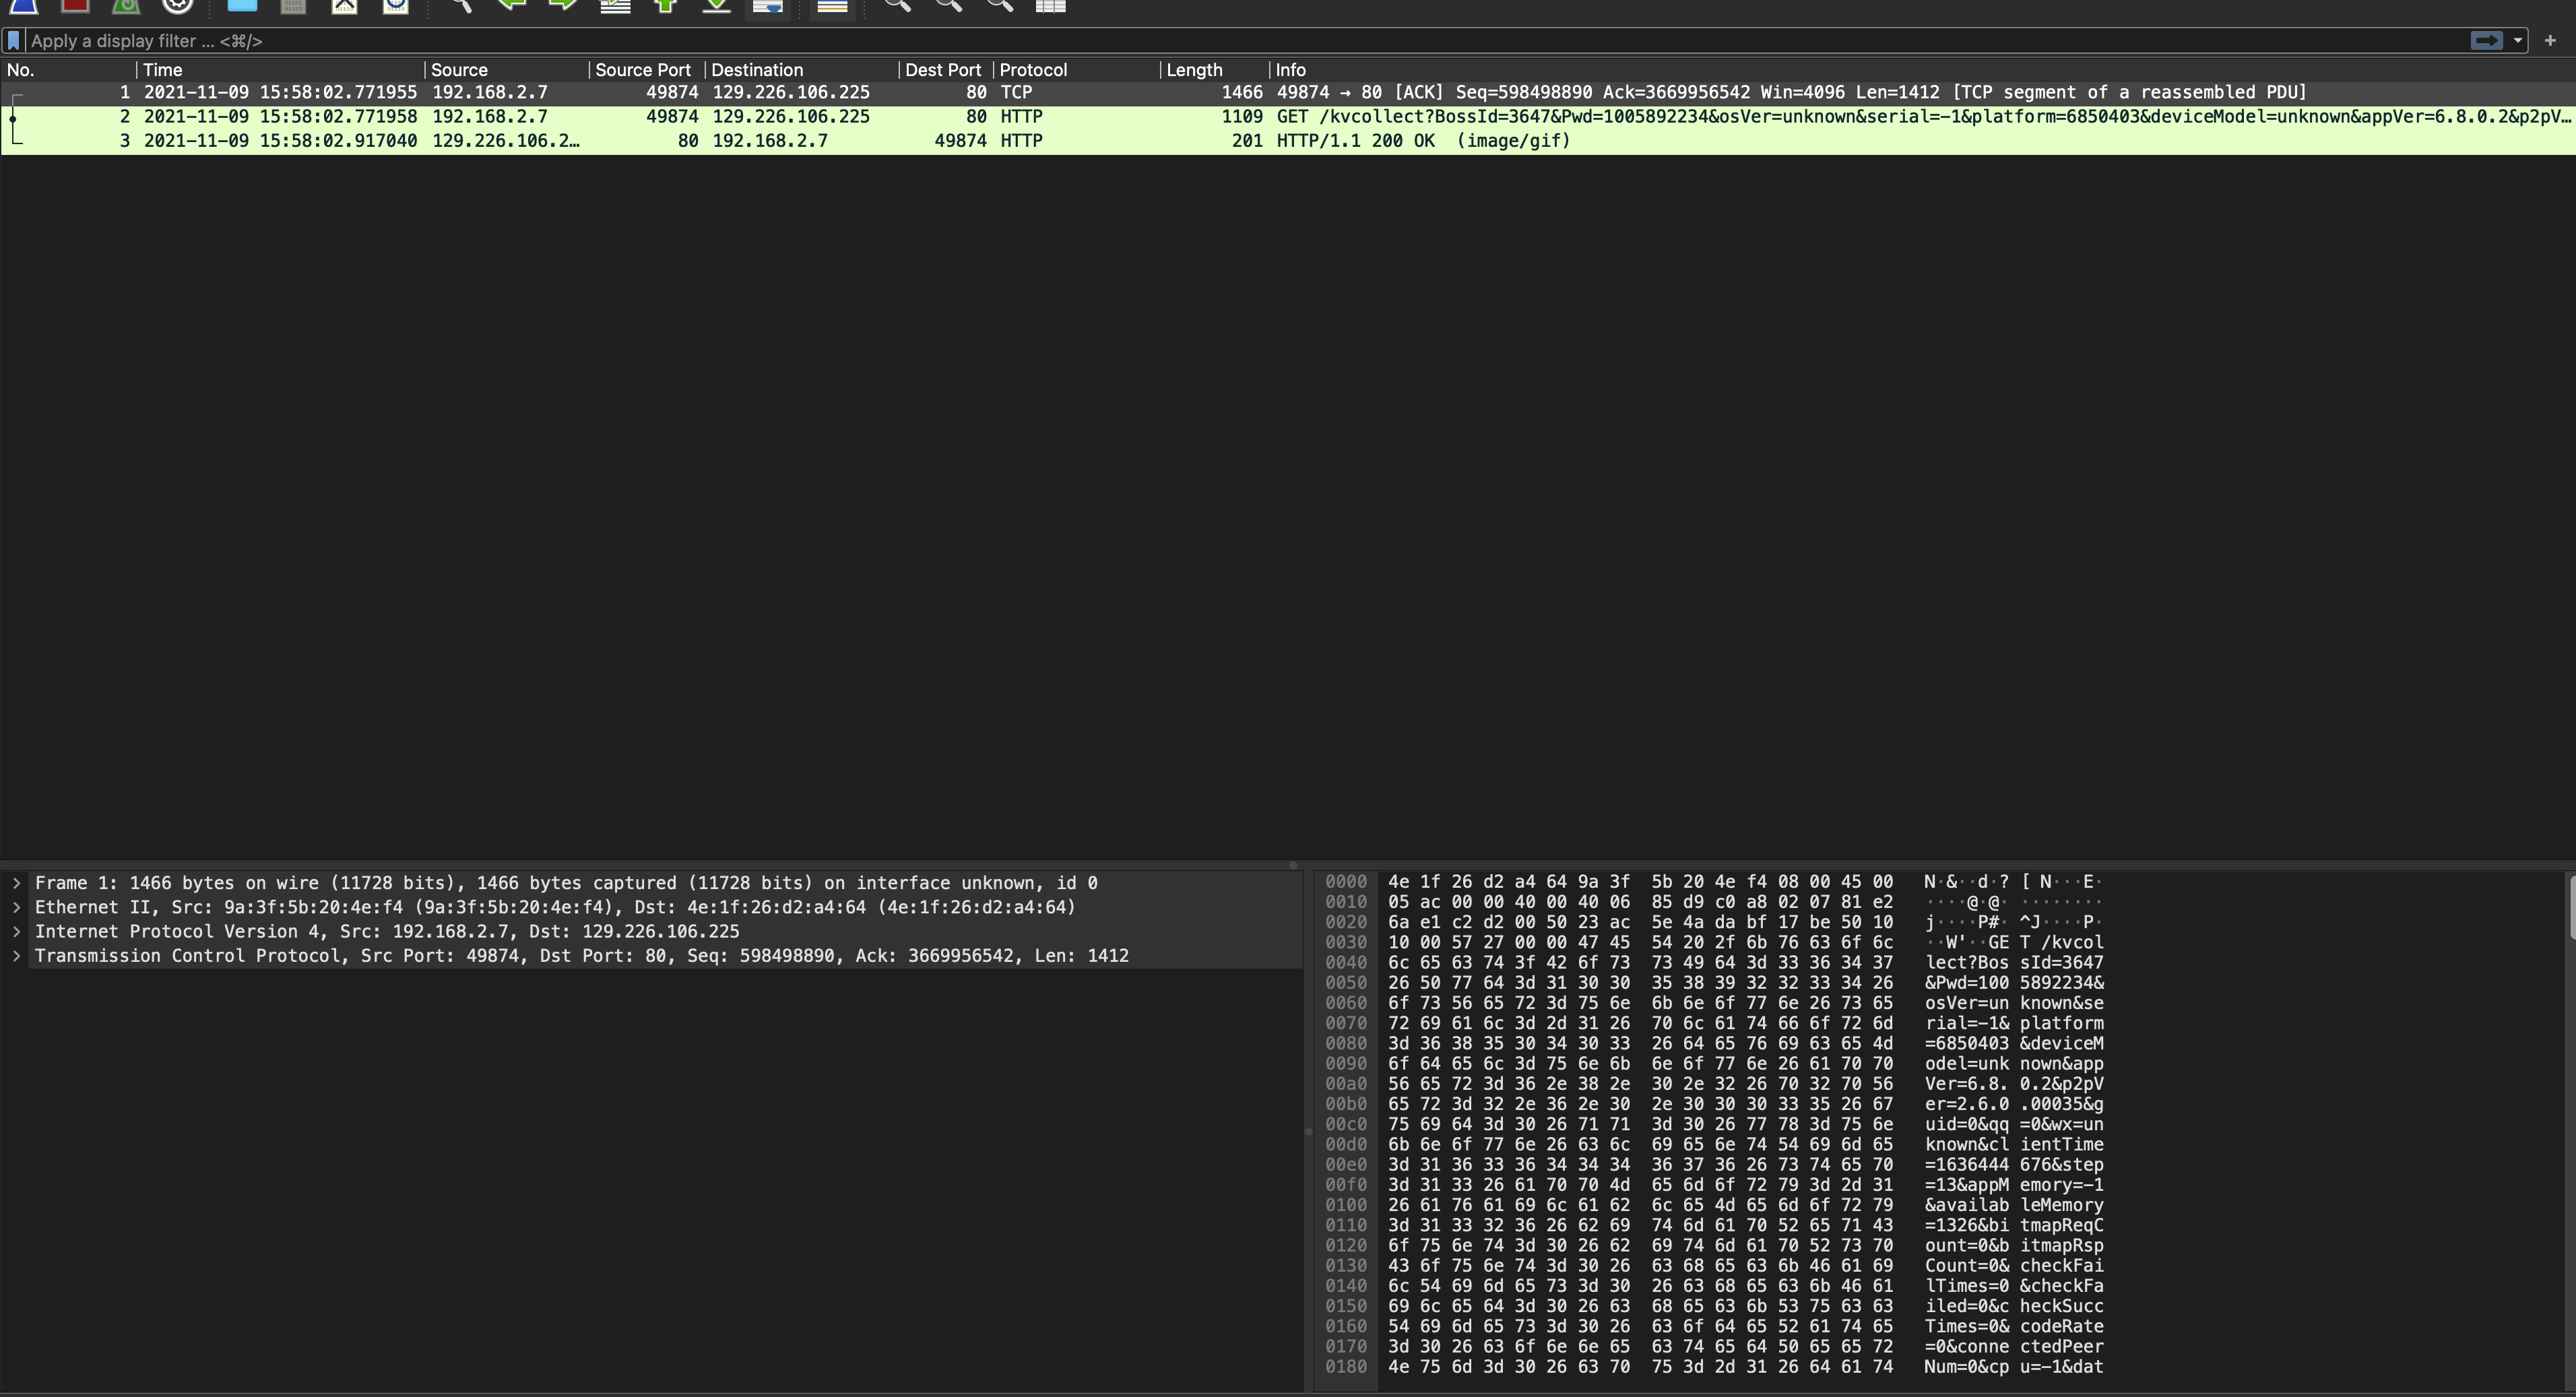
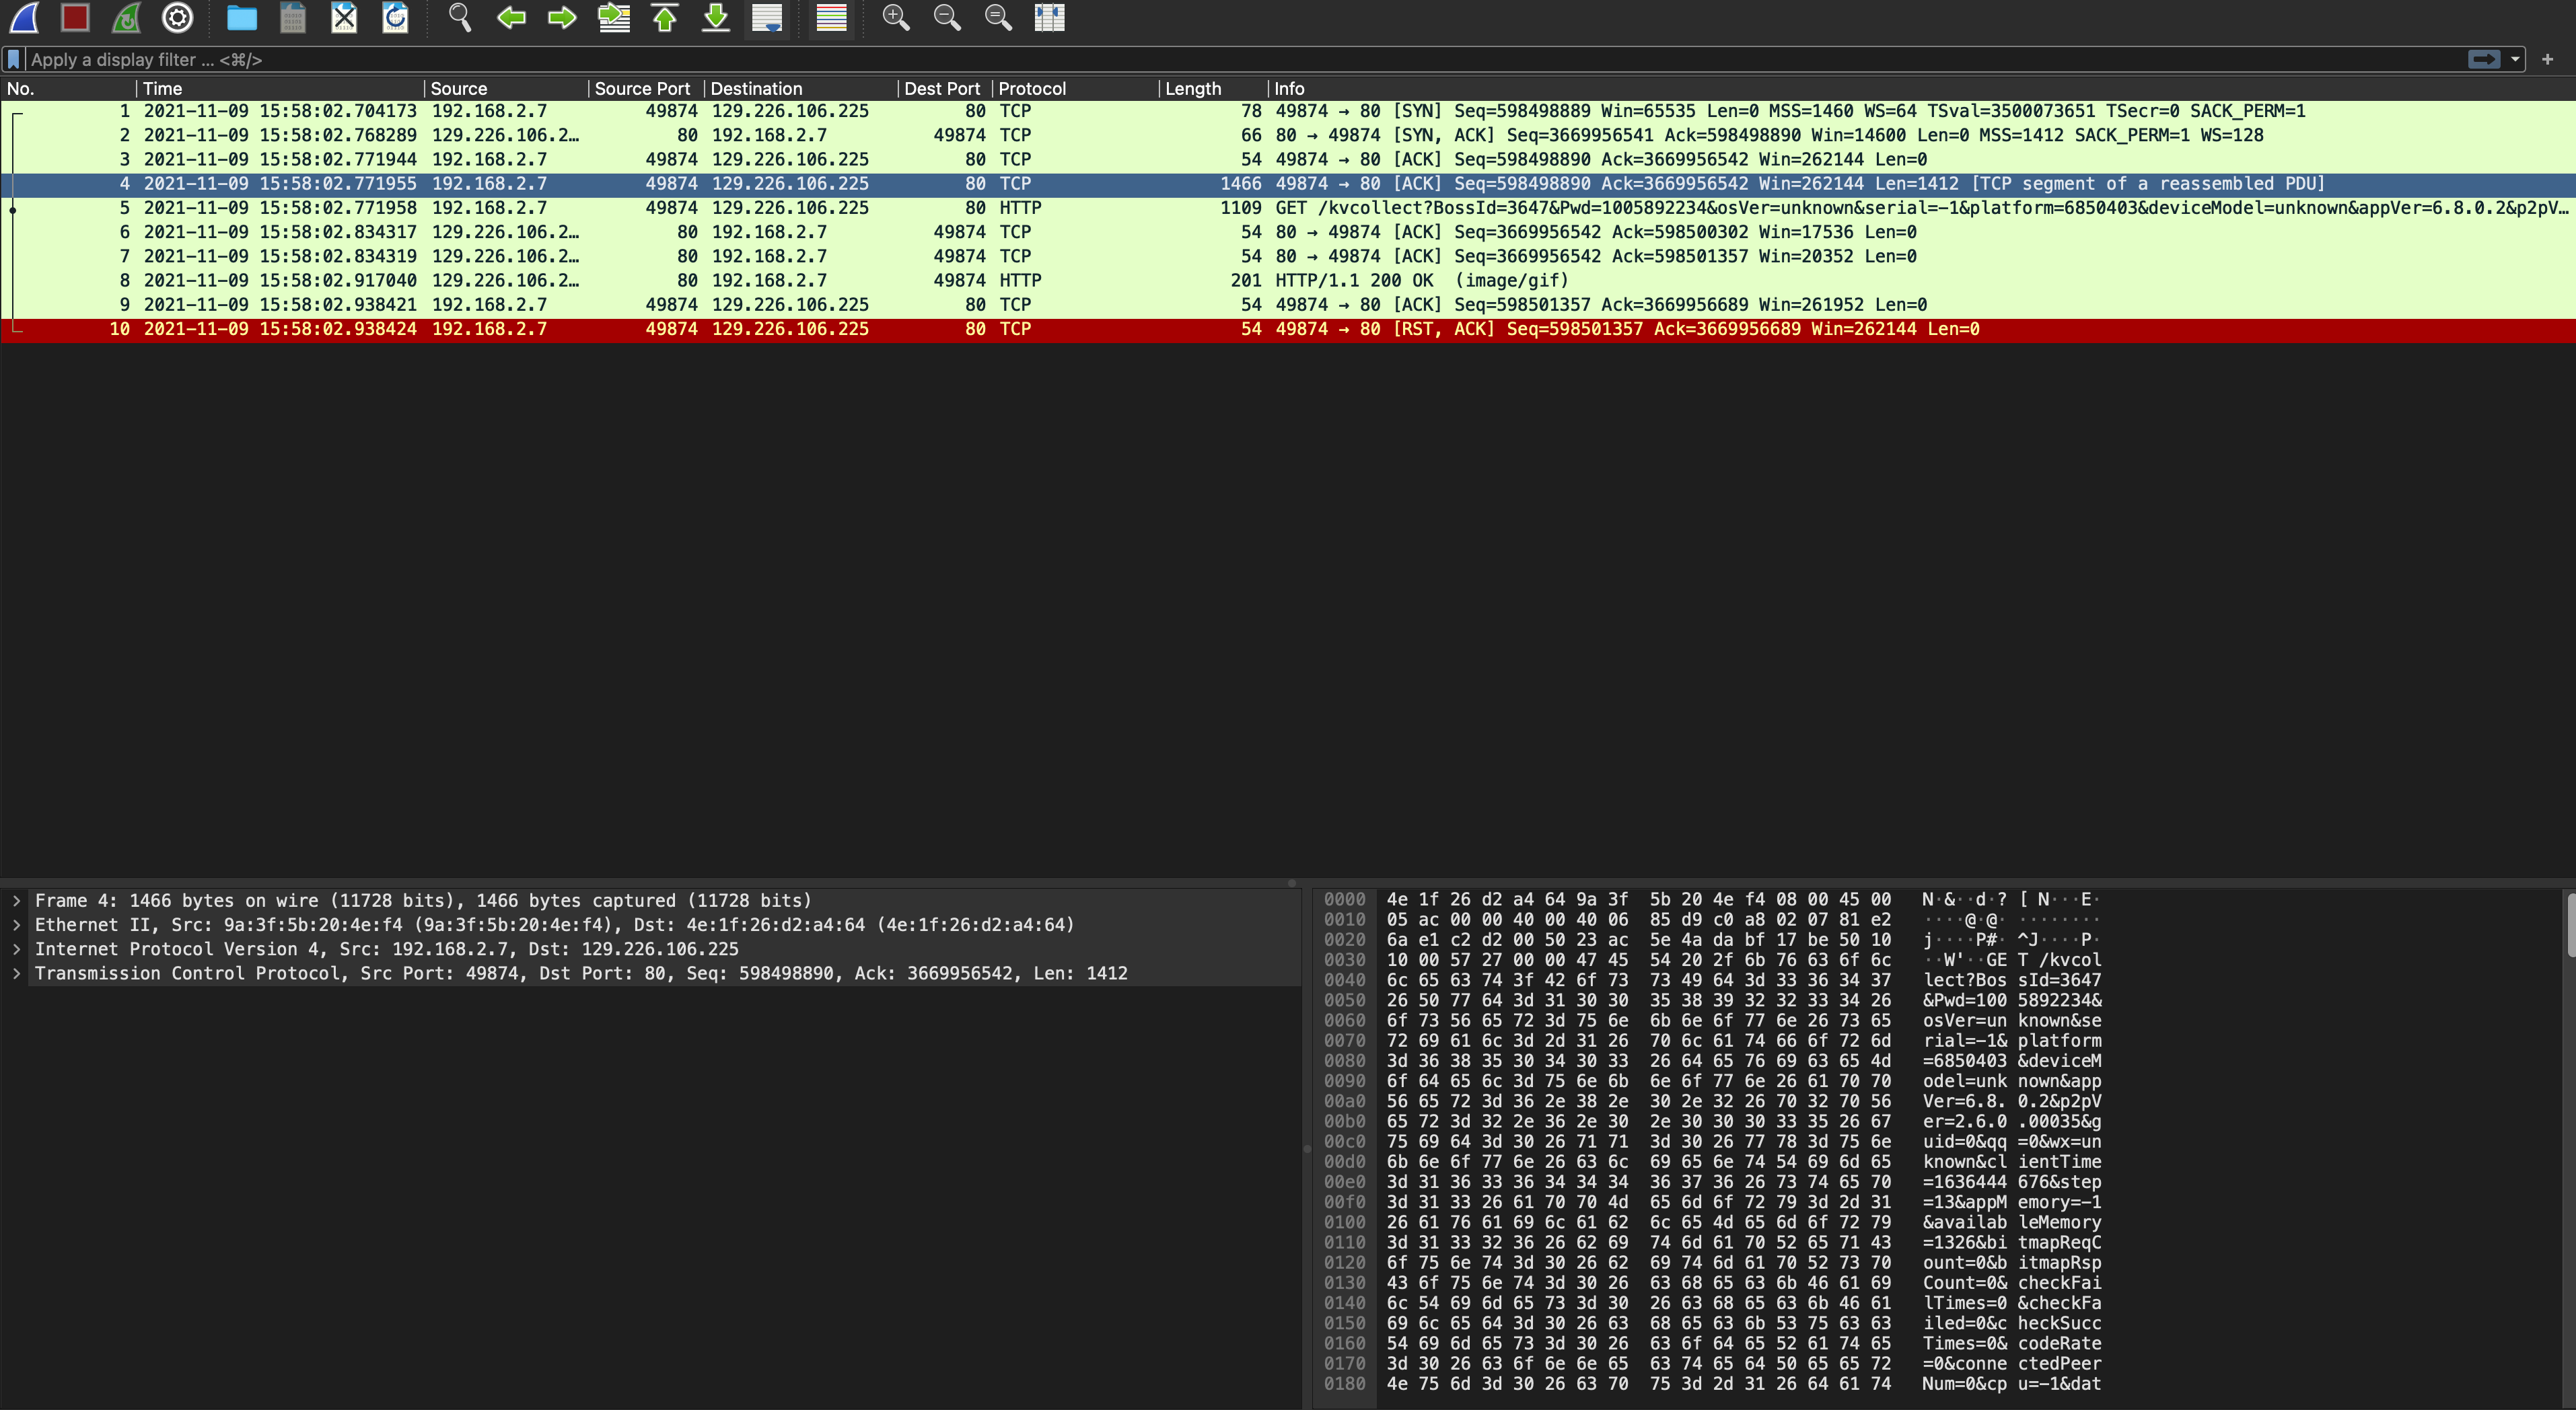
Below is a screen shot of HTTP flows: GET request spans packet 4 and 5, while response is packet 9:

To filter HTTP stream, if use -Y http only:

$ tshark -nr tcp.pcap -Y http -w http.pcap

Only the last segment of GET request will be saved to file:

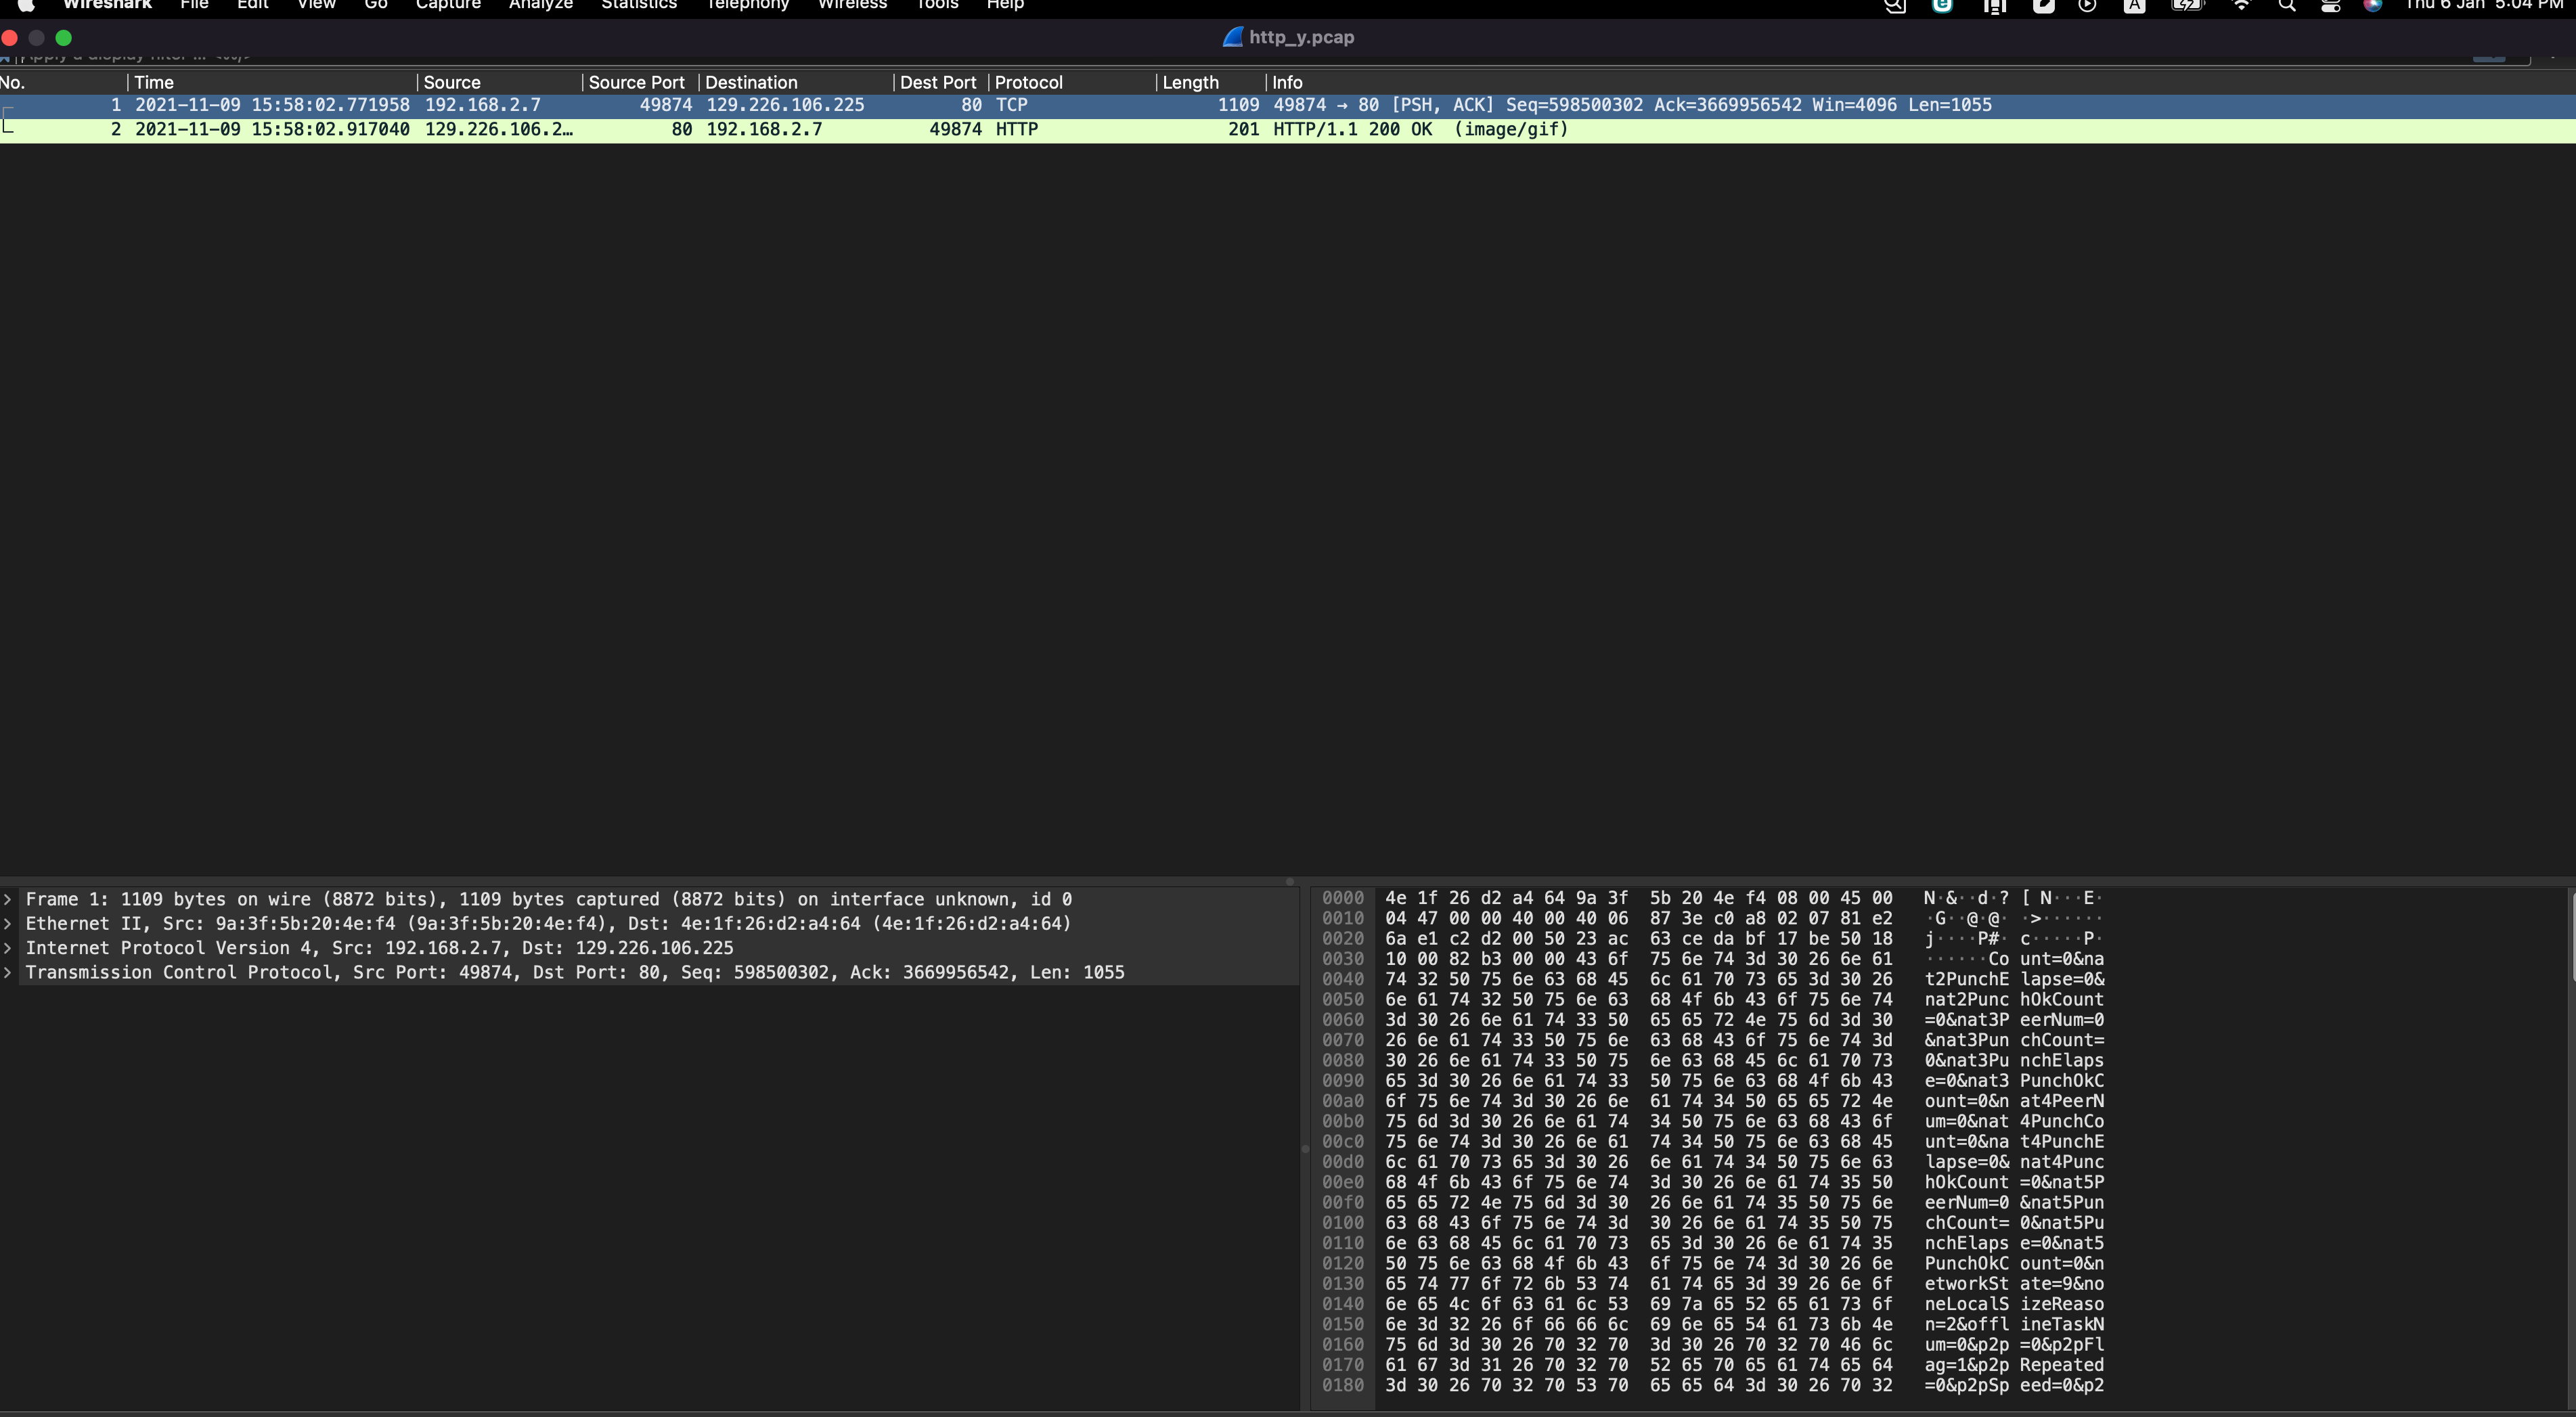
So -2 option is needed:

$ tshark -nr tcp.pcap -Y http -2 -w http.pcap

This time, the full GET request is saved:

Process pcapng file with multiple interfaces

When processing pcapng file which have multiple interfaces, you may meet following errors:

pcap_next_ex() [an interface has a snapshot length 262144 different from the type of the first interface]

Then capinfos shows you there are multiple interfaces with different capture lengths:

$ capinfos test.pcapng
File name:           test.pcapng
File type:           Wireshark/... - pcapng
......
Number of interfaces in file: 2
Interface #0 info:
                     Encapsulation = Ethernet (1 - ether)
                     Capture length = 1600
                     Time precision = microseconds (6)
                     Time ticks per second = 1000000
                     Number of stat entries = 0
                     Number of packets = 2474
Interface #1 info:
                     Encapsulation = Ethernet (1 - ether)
                     Capture length = 262144
                     Time precision = microseconds (6)
                     Time ticks per second = 1000000
                     Number of stat entries = 0
                     Number of packets = 13

One solution is to convert the pcapng to pcap file, then libpcap can process it:

tshark -F pcap -r test.pcapng -w test.pcap

Build tshark on CentOS 7

I want to build & debug tshark on CentOS 7 (No need GUI), and the first step is installing cmake3:

$ sudo yum install cmake3

Create a build directory under Wireshark source code, and Run following commands:

$ cd build
$ cmake3 -DBUILD_wireshark=OFF -DCMAKE_BUILD_TYPE=Debug ..
$ make

That’s it!

References:
How to build and install tshark without Wireshark?;
Wireshark docs.

Use OpenSSL to simulate TLS 1.3 “Session Resumption”

Thanks the great help from OpenSSL community, I finally can simulate an TLS 1.3 “Session Resumption”. The Operation System I used is OmniOS, and OpenSSL version is 1.1.1k, but I think the methods here can also be applied to other platforms:

(1) Open one terminal to launch tcpdump to capture TLS packets:

$ pfexec /opt/ooce/sbin/tcpdump -w tls.pcap port 443

(2) Open another terminal to initiate the first TLS 1.3 session:

$ openssl s_client -connect cloudflare.com:443 -tls1_3 -sess_out sess.pem -keylogfile keys1.txt
......

Once the connection is established, input “GET /” to trigger TLS 1.3 Server to send “New Session Ticket” message, and this will be saved in sess.pem file.

(3) Initiate another TLS 1.3 session to reuse the saved “Session Ticket“:

$ echo | openssl s_client -connect cloudflare.com:443 -tls1_3 -sess_in sess.pem -keylogfile keys2.txt

(4) Stop the tcpdump process.

(5) Combine two keys file into one:

$ cat keys1.txt keys2.txt > keys.txt

Then the keys.txt can be used to decrypt the two TLS 1.3 sessions (refer Use Wireshark to decrypt TLS flows).