The establishment of SSH session consists of 2 parts: build up the encryption channel and authenticate user. To understand the whole flow better, I usetcpdump/Wireshark to capture and analyze the packets. Server is OpenBSD 6.1 and client is ArchLinux. The tcpdump command is like this:
sudo tcpdump -A -s 0 'net 192.168.38.176' -i enp7s0f0 -w capture.pcap
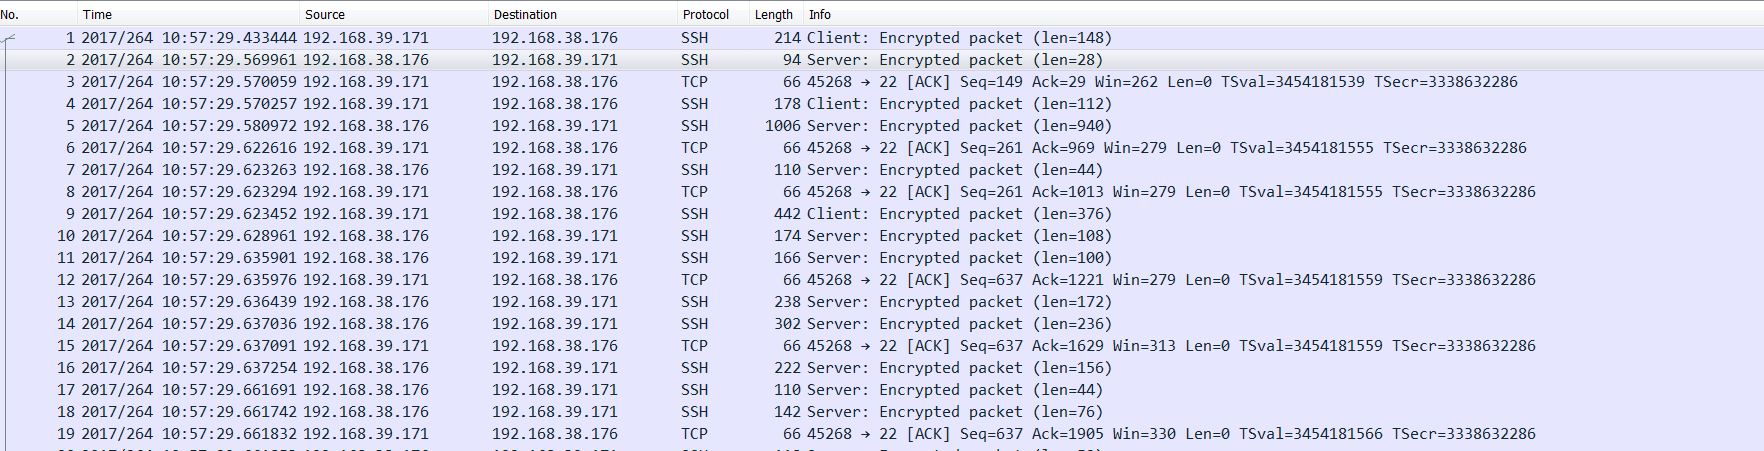
(1) Connect server first time:

The captured packets:

We can see the client/server negotiated SSH version first (In fact, client and server sent SSH version simultaneously, so please don’t misunderstand client sent first, then server responded. Use “nc 192.168.38.176 22” command to check.)
, then exchanged public key to generate secret key. The server issued “New Keys” message, and waited for client to answer.
(2) Accept server’s public key but not input password:

The captured packets:

The first packet should be client acknowledged server’s “New Keys” message, then there are some interactions. Now the encryption channel is set up.
(3) Enter password and authenticate user:

The captured packets:
These packets are all encrypted data. If user’s password is correct, the whole SSH session will be ready, and you can administrator server now.
Reference:
Understanding the SSH Encryption and Connection Process.